Showing posts with label dress. Show all posts

Friday, October 22, 2010

Remake: Ruffled Poncho

It's that time of year in the North-Midwest. There's frost on the grass in the morning, Apple Cider is a grocery staple, and cozying up in your favorite blanket with a mug of coffee/cocoa/tea is a luxury we all indulge in.

Wouldn't we love it if we could stay wrapped up in our blankets all day? But that would make it a shawl or poncho... well there's an idea! And that's where my two yard sale finds com in.


A chenille yarn throw and a full length knit skirt. Fifty cents each!

As you can see, the blanket is a little worn. The tag on it says "Dry Clean Only", and the easiest way to take care of that is to cut the tag off. Really, I'm not going to dry clean it. I just pop it in the wash to get any shrinking done and over with.

**Note to self: chenille yarn doesn't shrink...it fuzzed out all over the washing machine**

1.)So with everything washed and dried, I trim off the scraggly ends.


2.) Fold the blanket into fourths, and cut a shallow neck hole. You may want to use a shirt as a guide. (Remember: Start small!)


3.) Unfold once (so it's only folded in half: short ends together at the bottom), cut down the center from neck to bottom edge.


4.) Cut strips from the skirt. I cut four strips about 4 inches wide and then sewed three pieces together to make a long ruffle around the neck and down the front, with one piece to trim the bottom edges. Of course how many you need to cut etc. will all depend upon your available materials.


5.) Pin and stitch the trim in place.


6.) Wear! The edges are a little rough yet, I might make my own bias tape and sew that on later.


I just noticed the strings hanging down. LOL I missed those ones but since it's all stitched, it's easily taken care of with a quick snip.



Thursday, October 21, 2010

Shirt to Skirt Tutorial: The Fourth and Final Olympic Tee

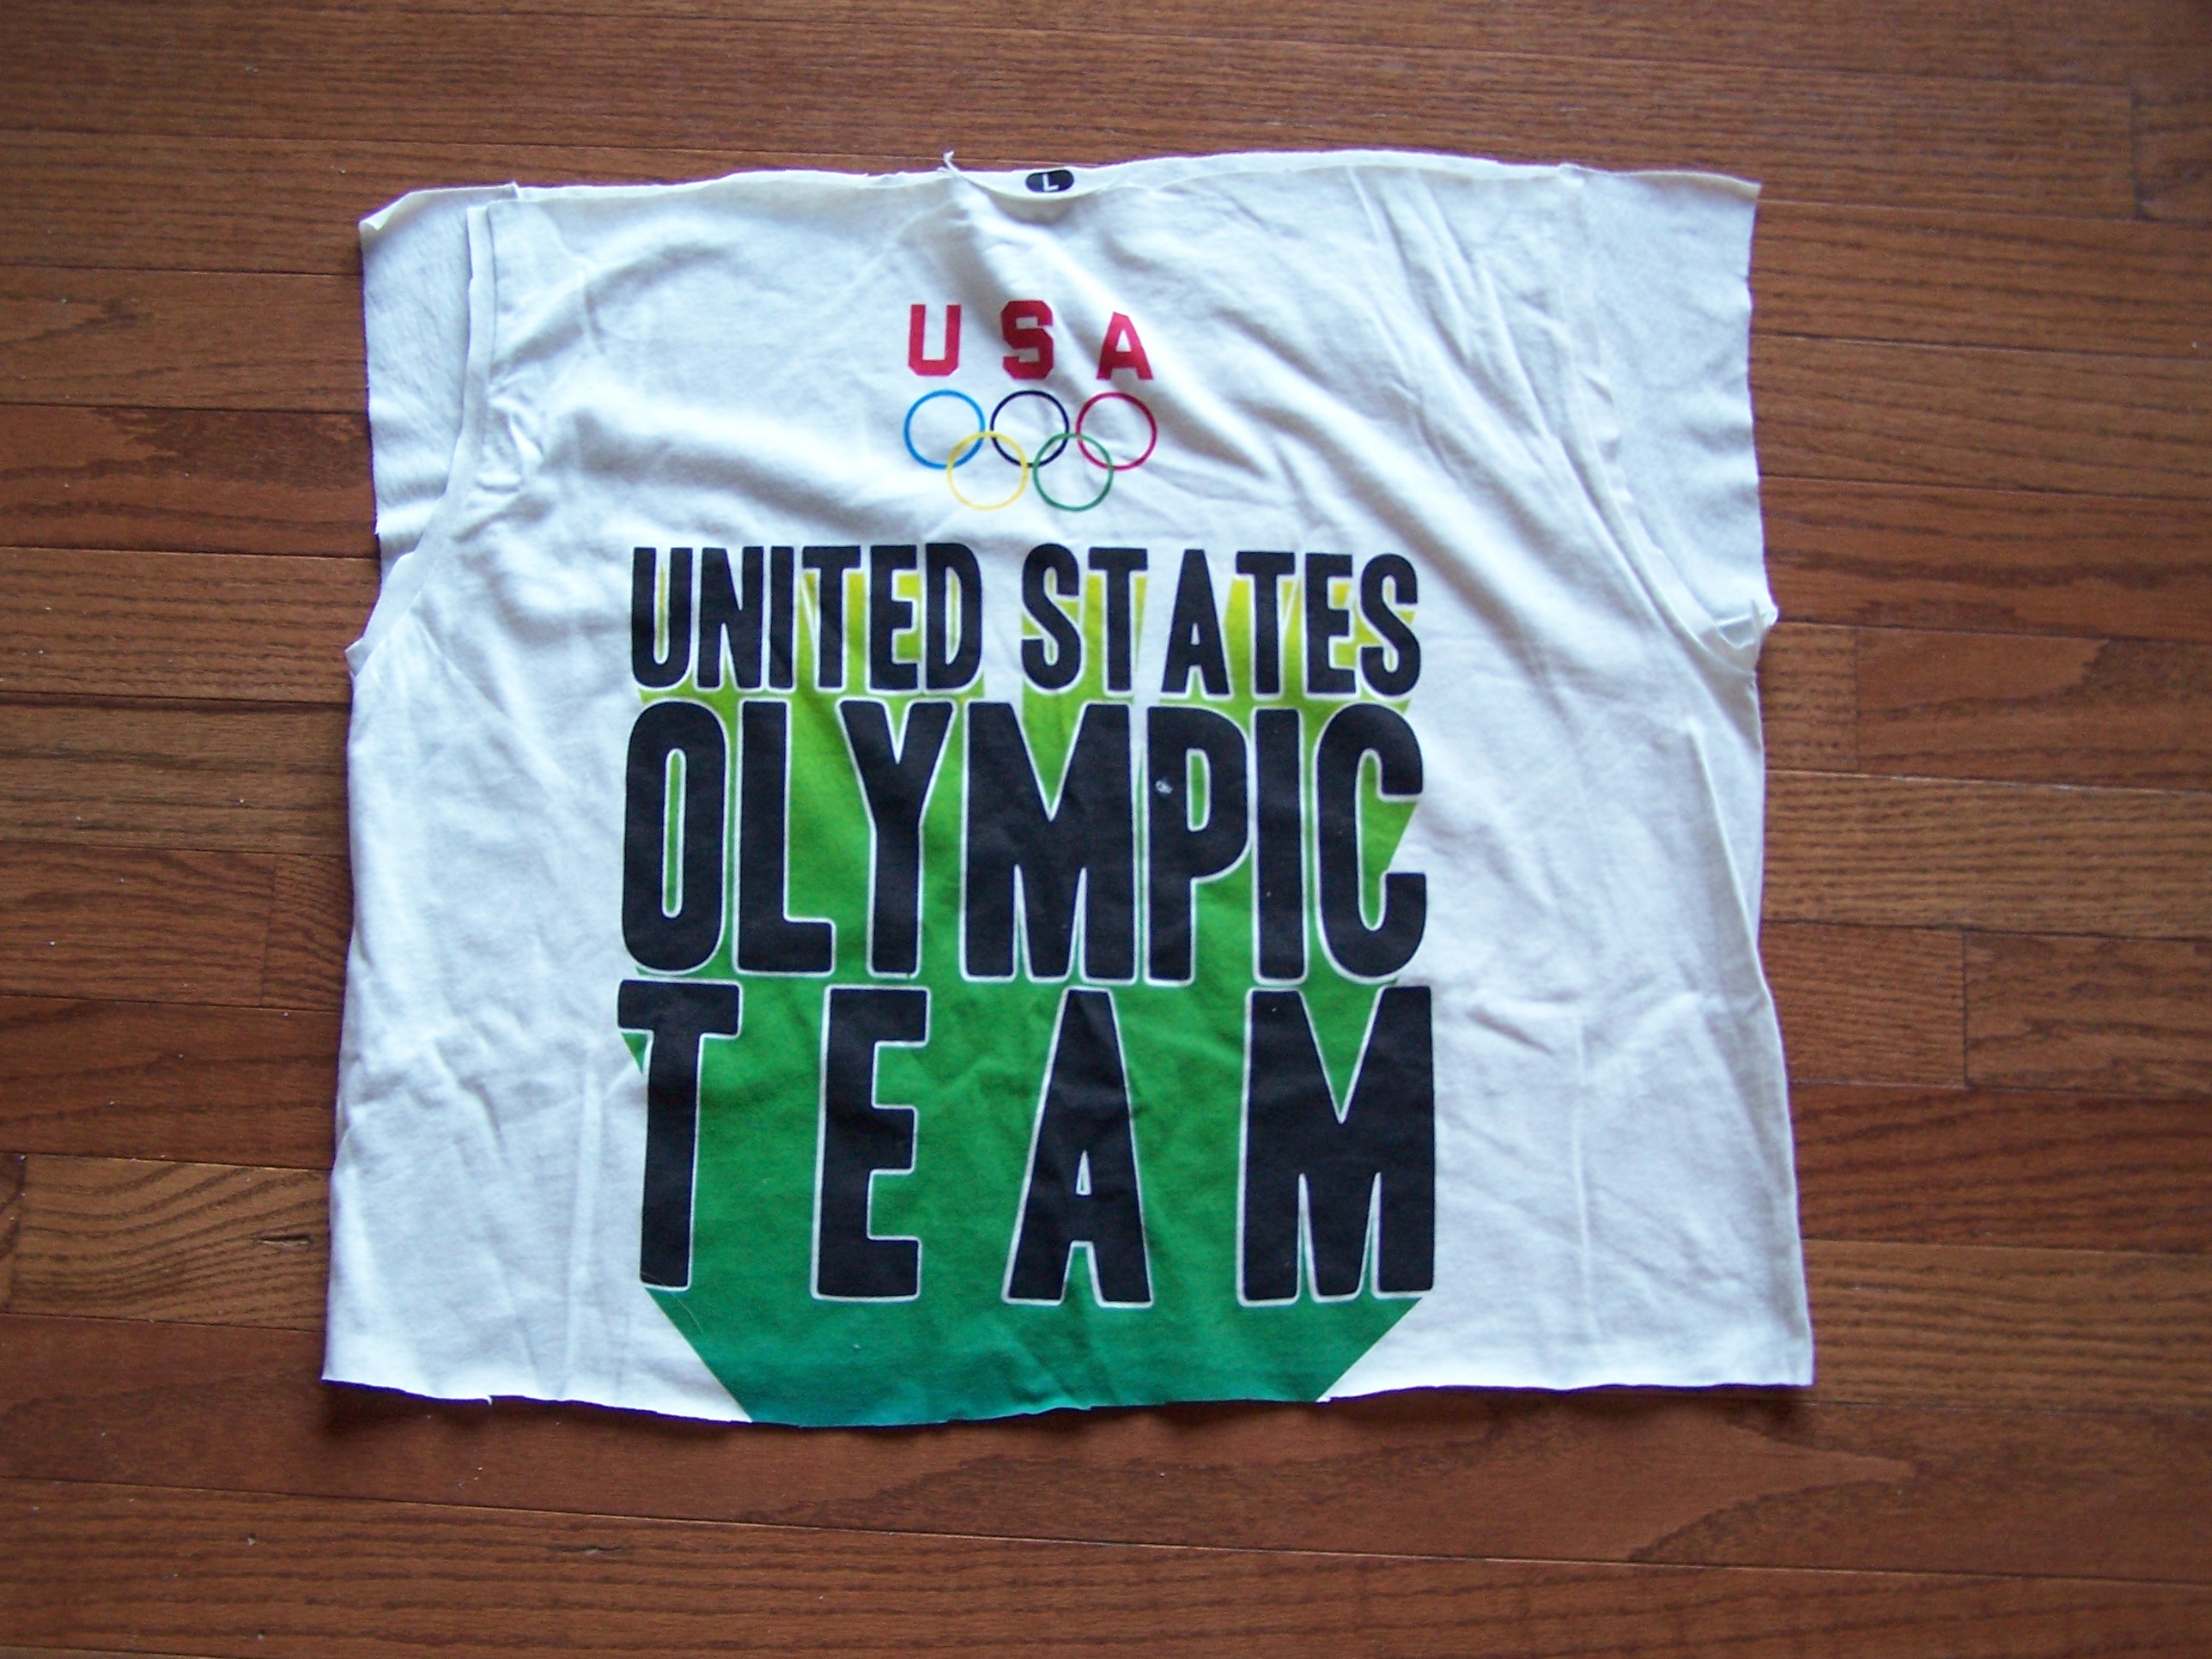
The second off-white olympic tee is in for a completely different use... and I think it's my favorite! We're going to cut, sew, and add a little embellishment to turn a so-so top into a cute bottom (and we all want a cute bottom).

1.) Cut the Sleeves off keeping it in alignment with the sides of the shirt.

2.) Cut the shoulders to form a straight line at the top.

3.) Cut the bottom to the length you want your skirt, plus an inch (add more if you will be making a casing for your elastic).


4.) We're going to make some easy (What? Yes, I said easy!) pockets using the front half of the sleeves. Cut only the front portion of the sleeves about an inch from the curved seam, then fold inward and stitch down.


5.) On the piece you cut from the bottom, cut in half at the sides. You will use one piece to make your pockets.


I'm not entirely sure which is best... sewing the piece on now, or after you embellish. Here's what I did:

6.) Sew one piece to the pocket-front, stitching across the top/waist.


7.) Flip the piece to the inside of the skirt and stitch across the bottom edge, and then down the center. Easy pockets!


8.) Sew the open side seams together-Right-Sides together, of course.

9.) Now for the fun part... embellishing! Using some coordinating lace or trim, make patches to cover the silk-screening.


The Black Lace I was planning on using was a little too see-through. So I cut patches from leftover pieces, to go with the lace.


10.) When you are satisfied with your arrangement, sew your patches in place.

*** This is where I am torn about making the pockets prior to embellishing. If I waited to make the pockets I would have had the straight stitching lines running through the patches. However, since I made the pockets first, I had to arrange the patches so as not to sew the pockets shut.

If you opt to embellish first, at this point you would sew in your pocket panel using steps 6 and 7.


11.) Hem the Waist and Bottom edge of your skirt, and add your elastic. I chose to use the shirring technique as I did in the second Blue and Black Skiing shirt.


There you have it. A really simple skirt with pockets.

Monday, October 18, 2010

Transforming a Regular T-shirt into a Bib Ruffle Tee

Today starts a period of Stash-Busting... which actually means I really can't afford to buy more fabric or craft supplies so I had better use what I have. Now I know I'm the only one with this problem, so bear with me.

A while ago, I bought 4 USA Olympic t-shirts on clearance...no one wants them as is. On top of this, they have rather large designs on the front. If I'm going to revamp them, a little fabric flower just isn't gonna cut it. Fortunately, there are 2 sets of matching designs.

Set #1 Blue and Black Skiing Shirt


You see my problem.

There are many blogs out there, showing beautiful t-shirt makeovers starting with a relatively design-free shirt (check out "Adventures in Dressmaking" and "Tea Rose" in my links to the right).  The tees I have, however, are almost all silk-screen design.

So how can I make a stylish garment from a regular ol' boxy (men's!) t-shirt? Let's just say, lucky for me ruffles are en vogue this season.

1.) First I cut one tee, about an inch below the armpits.


2.) I then cut the bottom chunk into 2 1/2 inch strips. Since these strips are actually circles, I made a cut on each of them at the side to make long, flat, one layer strips.

**Save the top portion of the t-shirt as well as half the strips for another makeover**


3.) Using a gathering stitch on one side of the long strips, I made ruffles.


4.) Play with the neckline. The usual neckline isn't über flattering or feminine, so I cut off the collar and made a cut down the center front, as well as at the shoulders.


[caption id="attachment_220" align="aligncenter" width="300" caption="When I stitched it down, I folded the back collar in and the front collar out"][/caption]

5.) I played around with the arrangement of the ruffles, and decided on a bib style. I then pinned and sewed the ruffles down to the shirt.


I thought the blue would be particularly great with my jean skirt. Add my must-have-belt at my waist, and I was feeling sheksy!


”Image

Thursday, October 14, 2010

No-Sew Tutu

Does it really need more of an explanation?  A tutu is a costume favorite, but you don't need to buy one... you can make it yourself with no sewing knowledge whatsoever.

You Will Need:

  • 4 Yards Tulle (for adult size you may want at least 6 yards)

  • Ribbon

  • Scissors


1.) Cut the ribbon the length of the waist measurement plus 15 inches. Tie knots in the ribbon 7 inches in from each end.


2.) Roll the tulle into a long tube and cut 4 inch pieces.


3.) Once your pieces are cut you should have a pile of  rolled tulle strips. Unroll a strip and fold it in half end touching end. If this is too long for your needs, you may want to cut at the half, making two strips.

4.) Taking a strip of tulle, fold in half (end touching end). Starting at one knot, put the loop/folded-end on the ribbon. Then pull the ends through the loop thus tying the strip around the ribbon.


[caption id="attachment_193" align="aligncenter" width="300" caption="Ends pulled through the loop"][/caption]


[caption id="attachment_194" align="aligncenter" width="300" caption="Pull tight to secure it"][/caption]


5.) Continue tying the strips around the ribbon until all are knotted on.


Viola! A Tutu. Tie around the waist of your little ballerina/fairy/princess.


[caption id="attachment_202" align="aligncenter" width="194" caption="What girl wouldn't be happy in a tutu!?"][/caption]


Things you can add:

Slippers

Lace Crown

Pipe Cleaner Crown

Tuesday, October 12, 2010

Simple Sheath: A Unisex Costume Base with Multiple Use (Easy, Break out the Sewing Machine)

This Sheath Dress/Robe is the base for many costumes. I found it on this Rostitchery blog, and it's so simple to make, you feel like you're cheating!

From Rostitichery:

"This is one of the most popular costume silhouettes there is--the generic "princess/angel/medieval maiden/Renaissance damsel/magical wizard/monk/every-fairy-tale-princess-in-grimms'-anthology" gown."

I will add, it also makes an easy Samurai/Martial Arts Guy costume, which is what I've done for this tutorial. You can see the original post from Rostitchery by clicking the link above, but I will also give a quick how-I-did-it.

You Will Need:

  • Fabric, The best fabric for this is stretchy and some kind of knit (so you don't have to bother with hemming) Measure: Width-The length from wrist to wrist when child's arms are out; Length- Measure from top of shoulder to floor and double it

  • Scissors

  • Desired accessories


1.) Most fabrics will already be the width you need, so likely you won't need any cutting there. For my cuts, I folded my fabric in half (the short ends being the bottom) and had my son lay on it with his shoulders at the fold.

[caption id="attachment_144" align="aligncenter" width="225" caption="Please refer to Rostitchery for her cutting instructions"][/caption]

[caption id="attachment_145" align="aligncenter" width="225" caption="I wanted mine a little more fitted, so I cut the side as well as under the arm"][/caption]

[caption id="attachment_146" align="aligncenter" width="225" caption="Folded in half to make the cuts symmetrical"][/caption]

[caption id="attachment_147" align="aligncenter" width="225" caption="All cut"][/caption]

2.)  I made the Neck cut. ***It's worth repeating: Start out small, you can always make it a little bigger. Once that hole is cut, you can't go back.***


3.) Sew the sides starting at the edge of the sleeve and around to the bottom edge. Do not sew the bottom shut.

4.) Accessories and details make the costume what you want it to be. For my Samurai/Martial Arts guy I sewed a strip of felt (no hemming to worry about, again) around the neck and down the front for a faux robe look, and tied a belt of red felt around his waist. I also made a Japanese medallion for the head band by drawing on a piece of the felt. (My son wasn't liking the full length robe so I also cut it a little shorter.)


For a Jedi Robe you could use brown fabric and tan trim/ties

For an angel/princess/fairy, you could use gold rope trim to wrap around and crisscross the bodice area, add wings, slippers, a crown, etc.

Here is a blog about making your own slippers.

Thursday, October 7, 2010

A Quick Update: Bringing a 90's Jumper into the 21st Century

Why was this ever fashionable!?


When I see jumpers, I think of 3rd grade teachers from the 90's, and mothers of  15+ kids. Really they do nothing for anyone's shape.  So, what shall we do with these out of touch garments? Let's bring it up to to date with a quick make over.

1.) The first thing I did was fix the length. I put it on and pinned it up until I liked where the hem laid, then cut it about an inch longer.


Pinned up


Cutting up


2.) The next thing was that lovely neckline. Removing the buttons and pinning the straight edges back was the key to making a jumper go from flop to pop.


I then stitched the new neckline down.

3.) Now for the back. One way to mix it up is to cinch and secure it with a pin, easy enough. I wanted a small band pulling the back in, so I  removed the ties and used one to make the band, and cut off the extra length. I then turned it inside out so the seam would be hidden.


Pinch and Cinch a la New Dress A Day


Making of the Band


4.) All that's left is sewing the new hem (I like to do this step last, just in case I have to take in the sides first). I use my iron to fold the hem edge up, then stitch.


That's all it takes to go from drab to fab! I paired it with a belt to up the cuteness factor. Check out the new look:


What do you think? Are there items shoved to the back of your closet that could use a fresh look?