Showing posts with label scrap. Show all posts

Thursday, January 6, 2011

Make Your Own Scrappy Belt

Matching your outfit perfectly, laying smoothly, moving with you instead of holding you back or cutting into your abdomen... all great reasons to make your own belt. It's also easy to do and fun fun fun!


You Will Need:
  • Various fabric scraps
  • A Belt Buckle (you can either scavenge one from an old belt or buy one at your local sewing store)
  • Optional: Grommets 
I chose my fabric colors to go with the clothing I normally wear. The scraps I'm using are upholstery samples. If you use regular cotton, you may choose to add interfacing for a little more stiffness (but I've gone without before and it worked just fine).


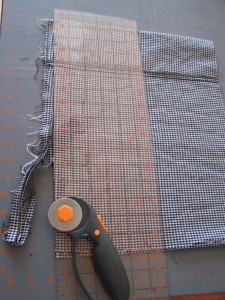
1.) First Cut your scraps into pieces the same width, but in various lengths. I cut mine 5 inches wide and the lengths were around 2-6 inches.


2.) Sew your pieces together at the ends making one long piece. Just remember that you will lose length when you sew them together so you will need extra to cover that plus 2 inches. Use an existing belt to help you decide length if you can. 


3.) Sew down the length of the piece forming a tube. Then turn right-side out.


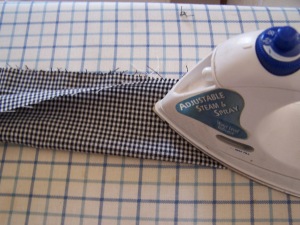
4.) Press flat, turning the raw ends in.


5.) If you would like a pointed tip, fold in the sides and press again.


6.) Top Stitch around the edge about 1/8 of an inch from the edge.


7.) Figure out where you want your holes. You can use grommets if you want, but I just make button holes.


8.) Make another small button hole 1/2 inch from the other end for your buckle.


9.) Insert the post, fold over the end, and stitch down.


You're ready to step out in style!


And here's one I made with regular cotton scraps:

Wednesday, October 27, 2010

A Sweet Little Pin Cushion-No Sew

Today, I had a nagging pain in my neck and head. Today, I had dishes and laundry piled up. Today, the laundry just isn't getting done. Today, I needed a simple craft. Something quick and pretty, with almost instant gratification.Today...I stumbled upon the sweet little pin cushion tutorial from Creations By Kara. Perfect!

I gathered my supplies...

Tuna Can, and coordinating Fabrics


Cut a strip and a circle...


I gathered and stuffed...


I glued...


And glued some more, then embellished...


Ahhhhhhhhh. I have crafted. My laundry is still there, but I feel my day is complete.

Do me a favor and check out Kara's tutorial. She did a great job, and so will you!

Monday, October 25, 2010

Making a Cowl Scarf-No Knitting Required

Cowl Scarves are everywhere this season. If you would like to add one (or more) to your wardrobe, inexpensively, look no further than your own closet. I will be using the leftovers from the long knit skirt in last Friday's blog. You, however, can use a sweater.

Here's the piece I had after cutting strips for the poncho


1.) I started by cutting the faux-pleat section from the waistband. If you are using a sweater, cut your strip double the width you want it to be when finished.
 
2.) I had to cut at one of the seams so that I had a long strip (otherwise I couldn't turn it right-side out). Then, just fold the right-sides together and sew the long edge. Turn right side out.


3.) Fold in the edge of one end, and stuff the other end inside of that. Stitch it shut.


You have now a cowl scarf. Wind it around your beautiful neck and accessorize with a just as beautiful pin.


Friday, October 8, 2010

Casual Friday: Using up Leftovers for a Smashing Scarf

I will admit it...I have a very hard time throwing any piece of material away. I know some day I will need just that fabric in just that amount for a project.

In that vein, thought, or... some might say... obsession; we're using the discarded bottom of the jumper from yesterday (remember we cut a large chunk to shorten the dress) to make a fashionable, drape-y scarf. You may have an old shirt, sweater, blanket (how great would a fringe-y fleece be!?), or piece of fabric, you'd like to use. The options are endless!

The piece I cut from the jumper was approximately 12 in. wide by 60 in. long.


[caption id="attachment_107" align="aligncenter" width="225" caption="Scrap from the Jumper"][/caption]


1.) Since this used to be the bottom of a dress the first thing I did was take out the hem, and press it flat. I can use all the width I can get!


[caption id="attachment_108" align="aligncenter" width="300" caption="Being a Basic Hem Stitch Makes Quick Work of Ripping it Out"][/caption]


2.) I squared up the edges, and since it wasn't quite long enough I cut it in half.


[caption id="attachment_109" align="aligncenter" width="225" caption="Getting all squared away"][/caption]


[caption id="attachment_110" align="aligncenter" width="225" caption="Half Off"][/caption]


3.) To get the extra length I desired, I sewed my two pieces together at the end. (If you have a particularly ravel-prone fabric you may want to zig-zag over the edges as well)


[caption id="attachment_111" align="aligncenter" width="225" caption="All together now"][/caption]


4.) I now had one long piece and could put it on to figure out how long I needed it to be. Then I cut off any extra.


5.) Almost done!  I then took my piece to the ironing board, folded it in half right-sides together, and pressed.


[caption id="attachment_113" align="aligncenter" width="300" caption="Pressing on"][/caption]


6.) Sew the scarf starting from one short end, continuing down the long edge and stopping at the other end. Leave this end open for turning right-side out.


[caption id="attachment_114" align="aligncenter" width="225" caption="Start at one end, turn the corner then..."][/caption]


[caption id="attachment_115" align="aligncenter" width="225" caption="...continue right down the long edge (that's my youngest, cheesing LOL)"][/caption]


7.) Lastly, just turn your long tube right-side out (the most time consuming part of this project), press, fold in the open end, and stitch closed.


[caption id="attachment_116" align="aligncenter" width="225" caption="Sewing up loose ends"][/caption]


As easy as that you have a lovely new accessory, that likely compliments your already existing wardrobe!


The best part? This is completely customizable. You can make it longer, shorter, sew a gathering stitch up the middle for a ruffle style, add fringe, fray the ends, whatever! Need a more masculine version... how about using a flannel shirt?


What will you use?