Something I will need after all the construction stuff is complete, is lovely furniture. I've already begun painting old cabinets...

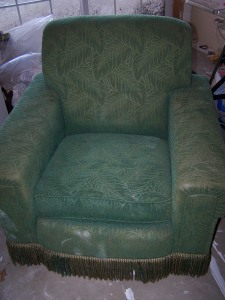
... My project yesterday involved a cute little arm-chair. Just the thing for relaxing!

What? You don't think it's so cute? You don't see it working with cheery yellow walls?
Neither do I.
So I took myself over to Joann's and priced out the upholstery fabric for recovering (which happens to be 50% off this week).
Yeah...not gonna happen on my budget. I have expensive tastes.
Fortunately my quilting experience has taught me, a great way to get lots of fabric very cheaply is to buy a sheet. I got a full size set at a super store for right around $20, less than half of the price of the material at Joann's.
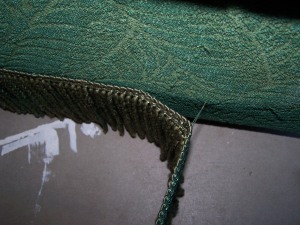
First thing I did was to take that horrible trim from the bottom.

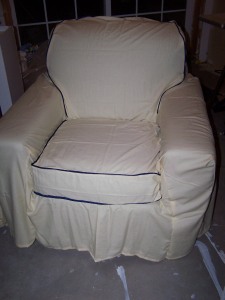
Borrowing an idea from the now defunct Trading Spaces, I removed the cushion and draped the flat sheet over my chair and got to pinning.

1.) After draping the sheet (wrong-side up) over the chair, adjust (but not tuck) so that the bottom edge is even all the way around.
2.) Pin in the places where there is just too much fabric, corners, curves, etc. to fit the sheet to your chair's shape. Spend a lot of time on this step. The more pins and time, the easier it will be to sew and the better it will look.
***For a No-Sew Slipcover, use a bunch of safety-pin to fit the sheet.***


3.) Gently pull the sheet off of the chair, turn right-side up and place back on the chair to check the fit. You will likely do this step at least twice, just remember the more time you spend here the better it will look.
*** No-Sew: after this step you're done! Just pull a pillow case over the seat cushion and you're good to go.***

4.) Once you have it just how you want it, cut the excess fabric about half an inch away from the pins.
5.) Sew the, now cut, seams. (This is where I added a little trim)

6.) The seat cushion is as simple as making pillows. Measure the top square (or rectangle in my case) from side to side, and add an inch to each measurement. Cut two squares, that size. for the gusset (the strip that goes around the width) do the same, adding that inch to the width and length.
7.) Sew that all together, leaving the back open at one seam so you can slip the cushion in there.
8.) Finishing the edge for the cushion cover has a few options. You can hand stitch it closed, use hook and loop (like Velcro) pieces, or if you're lazy like me and out of velcro you can safety-pin it shut.

I can't wait to post some finished room pictures!


Very nice! I have been looking for an easy way to recover some of my chairs and just can't imagine paying a ton for fabric if I am probably just going to mess up on it any way. Hey, this could also work to make a pattern for when you can afford fabric.
ReplyDeleteThe chair came out well. Good quick fix!
ReplyDeleteThank you. I think if I was to actually reupholster, I would choose a more durable fabric, myself.
ReplyDeleteoh is so beautiful!!!1
ReplyDeleteThank you very much, Sandra! I will be able to post pictures of the completed room very soon. :)
ReplyDeleteoho this is awesome.. very comfortable thanks for sharing such a wonderful furniture...
ReplyDeleteplatform beds
Great slipcover. The best part is that the chair cushion for comfort the seat has doesn’t lose any of its qualities.
ReplyDelete