Showing posts with label decorating on a budget. Show all posts

Friday, December 17, 2010

Snow and Ice Votive Holders: Kid Friendly Christmas or Winter Craft

A few years ago we were hit with a horrible winter storm which left us without power through the Christmas break (fortunately we had heat and a cooking surface with our wood stove fireplace). It's amazing how much we all depend upon electricity to entertain us! So, with three little boys to keep busy at night (when it was too dark for them to play in their rooms), and a definite need for candles, we started crafting.

My older two made the punched-tin candle holders most of us made as children. For my youngest, we made a Snow and Ice Votive Holder. It's the perfect wintry looking decor item, very easy, and costs only pennies.


You Will Need:
  • A small glass jar (I used bullion cube jars)
  • White school glue... you know, the kind with a bull on the label.
  • Table salt


1.) Collect your jar(s), wash, and remove any labels.


2.) Paint the school glue in an even and a little-more-than-thin coat on the outer surface of the jar.
A 10 year old and a 4 year old getting in on the fun.


3.) Sprinkle the table salt onto the glue.


Allow it to dry and you will have a snow covered candle holder...and a very proud child, too.


Monday, November 22, 2010

Thanksgiving Napkin Rings (Kid Friendly Craft)


Continuing with the Better Homes and Gardens Holiday Crafts Kids Can Make book (could they have picked a longer title?), today we do the multicolor corn napkin rings. I think these are very cute and a great addition to the harvest theme.


You Will Need:
  • Multicolored Corn (used for harvest decor)
  • Cardboard Tubes- TP tubes or Paper Towel tubes (you will get about 4 rings from a TP tube and 11 from a Paper Towel tube)
  • Tacky Glue
  • Glitter if Desired
  • Scissors
  • Measuring Tape
  • Small Paint Brushes
  • Newspaper and other mess containment items (I found a pizza box works wonderfully!)


1.) Remove the corn from the cob.I find this easy to get started by holding the kernels with one hand around the cob and turning the cob with the other hand... like a twisting or wringing motion.


2.) With the measuring tape mark the tubes at one inch intervals.


3.) Cut the tubes at the one inch marks to make rings.


4.) Paint the tacky glue onto the cardboard rings, and apply the kernels. We did this in sections, but whatever way works best is the way you should do it..

(Be advised that with young children-4 and under- the kernel placement will not be this neat. ;) )


5.) When the outer surface of the ring is covered as much as you can, you either just let it dry or place it in a baggy of glitter and roll/tilt gently to fill in the gaps.

(You may also cut strips of felt and glue them to the inside of the rings if so desired)


After the glue dries you have a lovely Thanksgiving Napkin Ring!

Monday, November 8, 2010

Straight up Slippin', Boo! Using a Bed Sheet for a Slipcover

I'm so close to having my own creative space! The walls are up and painted a cheery yellow. Next we put in the drop ceiling and carpet. Woo hoo!

Something I will need after all the construction stuff is complete, is lovely furniture. I've already begun painting old cabinets...


... My project yesterday involved a cute little arm-chair. Just the thing for relaxing!
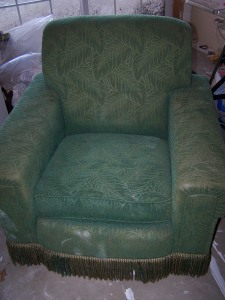


What? You don't think it's so cute? You don't see it working with cheery yellow walls?

Neither do I.

So I took myself over to Joann's and priced out the upholstery fabric for recovering (which happens to be 50% off this week).

Yeah...not gonna happen on my budget. I have expensive tastes.

Fortunately my quilting experience has taught me, a great way to get lots of fabric very cheaply is to buy a sheet. I got a full size set at a super store for right around $20, less than half of the price of the material at Joann's.

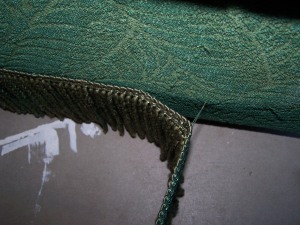
First thing I did was to take that horrible trim from the bottom.


Borrowing an idea from the now defunct Trading Spaces, I removed the cushion and draped the flat sheet over my chair and got to pinning.


1.) After draping the sheet (wrong-side up) over the chair, adjust (but not tuck) so that the bottom edge is even all the way around.

2.) Pin in the places where there is just too much fabric, corners, curves, etc. to fit the sheet to your chair's shape.  Spend a lot of time on this step. The more pins and time, the easier it will be to sew and the better it will look.

***For a No-Sew Slipcover, use a bunch of safety-pin to fit the sheet.***


3.) Gently pull the sheet off of the chair, turn right-side up and place back on the chair to check the fit. You will likely do this step at least twice, just remember the more time you spend here the better it will look.

*** No-Sew: after this step you're done! Just pull a pillow case over the seat cushion and you're good to go.***


4.) Once you have it just how you want it, cut the excess fabric  about half an inch away from the pins.

5.) Sew the, now cut, seams. (This is where I added a little trim)


6.) The seat cushion is as simple as making pillows. Measure the top square (or rectangle in my case) from side to side, and add an inch to each measurement. Cut two squares, that size. for the gusset (the strip that goes around the width) do the same, adding that inch to the width and length.

7.) Sew that all together, leaving the back open at one seam so you can slip the cushion in there.

8.) Finishing the edge for the cushion cover has a few options. You can hand stitch it closed, use hook and loop (like Velcro) pieces, or if you're lazy like me and out of velcro you can safety-pin it shut.
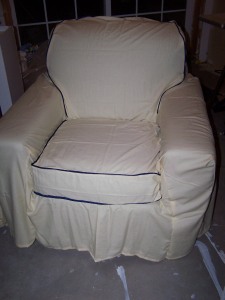
I can't wait to post some finished room pictures!