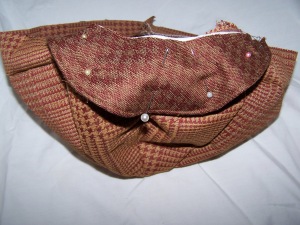
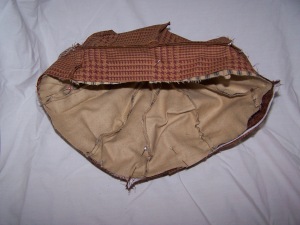
[caption id="attachment_69" align="aligncenter" width="225" caption="I know, right!?"]
 [/caption]
Bring on da funk!
Initially I bought it for the comedic flair, but when I looked in mirror it had a nice shape and fit. Therefore, I must try to duplicate it (the dollar bills just won't go with most of my ensembles).
Notice I said try.
I made templates from the pieces in the hat: A curved triangle, and a brim. I also cut 2 inch strips to make the band. However when all was said and done, the fabric I chose was too stiff and I think I should have cut the triangle pieces a little longer.
BUT when life gives you lemons... you know the rest.
So this is now a tutorial to make a Mod British-Type hat, which is equally as cute.
[caption id="attachment_71" align="aligncenter" width="225" caption="Number One is what we'll end up with."]
 [/caption]
I had a pretty tweed (I feel the need, the need...for tweed!) in my stash of upholstery samples so that's what I used, and a light-weight cotton flannel for the lining.
Since I don't have a vintage pattern and you likely don't either, we'll just make our own. You'll be surprised how easy it really is.
You Will Need:
- Pattern Pieces
- Fabric for the outer shell (what will be seen) and brim, somewhat stiff material such as tweed or a light denim~at least 20"x20"
- Fabric for the lining, I recommend a cotton or something breathable~20"x20" although you would be able to get away with less
- Interfacing, or Stiff Fabric
- Thread
- Sewing Machine
First we need our pattern pieces.
1.) Measure your head where you'd like the hat to sit (I like mine covering just the tips of my ears), remember this length for the band. Divide that number by 5.5 . That is the length, in inches, of the base of your triangle. For the rest of the triangle taper up until it's 7 inches. Remember: You want a curved edge.
**My measurement was 22.5, so I divided by 5.5 and got 4 inches
The brim is just traced from an existing ball cap, but you may want to adjust the size for a shorter brim (remember the 1/4 inch seam allowance).

2.) Place and trace your pieces, then cut:
8 triangles of the outside fabric (what you want seen)
8 triangles of the lining
2 brims of the outside fabric
2 brims of interfacing
1 strip of outer fabric for the band 2 in. wide and 3 inches longer than the measurement of your head long (this helps ensure the band will fit the cap).
[caption id="attachment_73" align="aligncenter" width="300" caption="Place and Trace"]
 [/caption]
[caption id="attachment_74" align="aligncenter" width="300" caption="Pieces cut out"]
 [/caption]
3.) Assemble the brim: Place the outer fabric brim pieces right sides together, then the interfacing on top. Using a 1/8 seam allowance, stitch the outer curve, but NOT the inner curve.

4.) Turn right-side out, and top stitch the outer curve very close to the edge.
5.) Assemble the cap: Place two triangle pieces right-sides together and stitch one side from base to tip using 1/4 in. seam allowance.
[caption id="attachment_76" align="aligncenter" width="225" caption="Do not sew across the bottom/base."]
 [/caption]
Repeat until all outer fabric pieces are sewn together to form the cap.

Repeat Step 5 for the lining pieces as well, and you should have these pieces:
[caption id="attachment_78" align="aligncenter" width="300" caption="2 caps-Outer fabric and Liner, 1 Brim"]
 [/caption]
6.) Remember the 2 in. wide piece? most patterns would have you cut an exact length and sew the ends together to form a circle, then sew this circle onto the cap portion. Only problem is, it almost never matches. One piece usually comes out bigger than the other. To insure a good fit I make it a little longer than I need and sew the band ends together last.
Place the outer cap and the band right-sides together, and stitch in place starting about one inch from the end of the band. Sew all the way around (1/4 in seam), up to the place you started but do not sew over top of the 1 inch end-piece, lift it up. Then sew the ends of the band together to form the circle. Cut off any excess from the ends.
7.) Pin the brim to the band, right-sides together (fit the inner curve to the straight edge of the cap), and stitch down 1/8 in. at the cap edge.
8.) Assemble the hat: Turn the outer cap inside-out. Pin the lining cap inside (right-sides together), matching seams and covering the brim. Sew around the edge, 1/4 in. seam, leaving a 4 in. opening to turn the hat right side out.
9.) Turn right-side out. Folding in the 4 in. unstitched portion, top stitch around the bottom edge of your hat with a 1/8 in. allowance. You have a new hat!


No comments:
Post a Comment