From Rostitichery:
"This is one of the most popular costume silhouettes there is--the generic "princess/angel/medieval maiden/Renaissance damsel/magical wizard/monk/every-fairy-tale-princess-in-grimms'-anthology" gown."
I will add, it also makes an easy Samurai/Martial Arts Guy costume, which is what I've done for this tutorial. You can see the original post from Rostitchery by clicking the link above, but I will also give a quick how-I-did-it.
You Will Need:
- Fabric, The best fabric for this is stretchy and some kind of knit (so you don't have to bother with hemming) Measure: Width-The length from wrist to wrist when child's arms are out; Length- Measure from top of shoulder to floor and double it
- Scissors
- Desired accessories
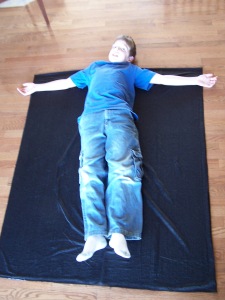
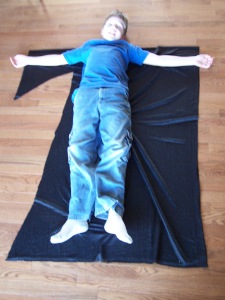
1.) Most fabrics will already be the width you need, so likely you won't need any cutting there. For my cuts, I folded my fabric in half (the short ends being the bottom) and had my son lay on it with his shoulders at the fold.
[caption id="attachment_144" align="aligncenter" width="225" caption="Please refer to Rostitchery for her cutting instructions"]
 [/caption]
[caption id="attachment_145" align="aligncenter" width="225" caption="I wanted mine a little more fitted, so I cut the side as well as under the arm"]
 [/caption]
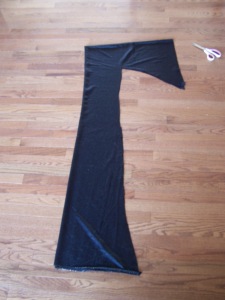
[caption id="attachment_146" align="aligncenter" width="225" caption="Folded in half to make the cuts symmetrical"]
 [/caption]
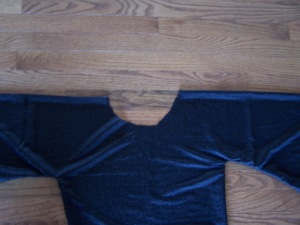
[caption id="attachment_147" align="aligncenter" width="225" caption="All cut"]
 [/caption]
2.) I made the Neck cut. ***It's worth repeating: Start out small, you can always make it a little bigger. Once that hole is cut, you can't go back.***

3.) Sew the sides starting at the edge of the sleeve and around to the bottom edge. Do not sew the bottom shut.
4.) Accessories and details make the costume what you want it to be. For my Samurai/Martial Arts guy I sewed a strip of felt (no hemming to worry about, again) around the neck and down the front for a faux robe look, and tied a belt of red felt around his waist. I also made a Japanese medallion for the head band by drawing on a piece of the felt. (My son wasn't liking the full length robe so I also cut it a little shorter.)


For a Jedi Robe you could use brown fabric and tan trim/ties
For an angel/princess/fairy, you could use gold rope trim to wrap around and crisscross the bodice area, add wings, slippers, a crown, etc.
Here is a blog about making your own slippers.

Thank you! My Little Miss has been asking for a witch costume and I've been wondering how I'd make it... your tutorial has just solved my problem!
ReplyDelete