In that vein, thought, or... some might say... obsession; we're using the discarded bottom of the jumper from yesterday (remember we cut a large chunk to shorten the dress) to make a fashionable, drape-y scarf. You may have an old shirt, sweater, blanket (how great would a fringe-y fleece be!?), or piece of fabric, you'd like to use. The options are endless!
The piece I cut from the jumper was approximately 12 in. wide by 60 in. long.
[caption id="attachment_107" align="aligncenter" width="225" caption="Scrap from the Jumper"]
 [/caption]
1.) Since this used to be the bottom of a dress the first thing I did was take out the hem, and press it flat. I can use all the width I can get!
[caption id="attachment_108" align="aligncenter" width="300" caption="Being a Basic Hem Stitch Makes Quick Work of Ripping it Out"]
 [/caption]
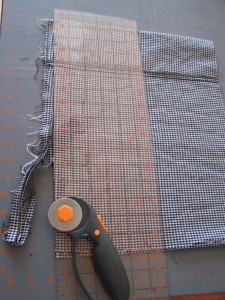
2.) I squared up the edges, and since it wasn't quite long enough I cut it in half.
[caption id="attachment_109" align="aligncenter" width="225" caption="Getting all squared away"]
 [/caption]
[caption id="attachment_110" align="aligncenter" width="225" caption="Half Off"]
 [/caption]
3.) To get the extra length I desired, I sewed my two pieces together at the end. (If you have a particularly ravel-prone fabric you may want to zig-zag over the edges as well)
[caption id="attachment_111" align="aligncenter" width="225" caption="All together now"]
 [/caption]
4.) I now had one long piece and could put it on to figure out how long I needed it to be. Then I cut off any extra.

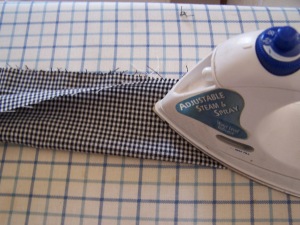
5.) Almost done! I then took my piece to the ironing board, folded it in half right-sides together, and pressed.
[caption id="attachment_113" align="aligncenter" width="300" caption="Pressing on"]
 [/caption]
6.) Sew the scarf starting from one short end, continuing down the long edge and stopping at the other end. Leave this end open for turning right-side out.
[caption id="attachment_114" align="aligncenter" width="225" caption="Start at one end, turn the corner then..."]
 [/caption]
[caption id="attachment_115" align="aligncenter" width="225" caption="...continue right down the long edge (that's my youngest, cheesing LOL)"]
 [/caption]
7.) Lastly, just turn your long tube right-side out (the most time consuming part of this project), press, fold in the open end, and stitch closed.
[caption id="attachment_116" align="aligncenter" width="225" caption="Sewing up loose ends"]
 [/caption]
As easy as that you have a lovely new accessory, that likely compliments your already existing wardrobe!
The best part? This is completely customizable. You can make it longer, shorter, sew a gathering stitch up the middle for a ruffle style, add fringe, fray the ends, whatever! Need a more masculine version... how about using a flannel shirt?
What will you use?


Great Blog post :) Super simple and good use of extras!!
ReplyDeleteThanks! :)
ReplyDelete