Thursday, October 28, 2010
Taking a Break
Due to construction on a new sewing room (yay!) I will be taking a little break from posting. Please enjoy the links to the right, though, for more sewing or crafting fun!
Wednesday, October 27, 2010
A Sweet Little Pin Cushion-No Sew
Today, I had a nagging pain in my neck and head. Today, I had dishes and laundry piled up. Today, the laundry just isn't getting done. Today, I needed a simple craft. Something quick and pretty, with almost instant gratification.Today...I stumbled upon the sweet little pin cushion tutorial from Creations By Kara. Perfect!
I gathered my supplies...
Tuna Can, and coordinating Fabrics

Cut a strip and a circle...
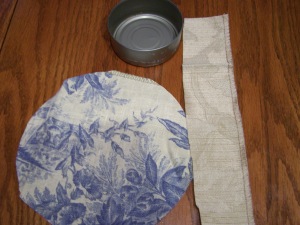
I gathered and stuffed...

I glued...

And glued some more, then embellished...

Ahhhhhhhhh. I have crafted. My laundry is still there, but I feel my day is complete.
Do me a favor and check out Kara's tutorial. She did a great job, and so will you!
I gathered my supplies...
Tuna Can, and coordinating Fabrics

Cut a strip and a circle...

I gathered and stuffed...

I glued...

And glued some more, then embellished...

Ahhhhhhhhh. I have crafted. My laundry is still there, but I feel my day is complete.
Do me a favor and check out Kara's tutorial. She did a great job, and so will you!
Labels:
Accessories,
cheap,
decor,
easy,
inexpensive,
kid friendly,
no-sew,
Re-Purposing,
repurpose,
scrap,
stash buster,
Tutorial,
upcycle,
Upcycling
Tuesday, October 26, 2010
Nifty-Gifty: A Quick Little Basket with Sew or No-Sew Instructions
This sweet little recycling piece is actually a project I did in Summer Camp around the age of ten (in a group of 9-12 yr olds), using hot glue guns instead of sewing machines. It makes use of an old plastic bottle and fabric scraps; it's a great fat quarter/scrap project; AND it makes a perfect little gift basket for smaller items.
You Will Need:
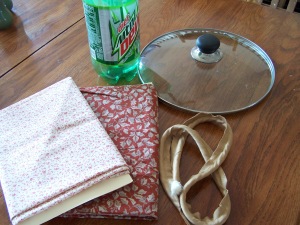
1.) Cut 2 circles from your fabric. I used a 13 inch pot-lid to trace them out, but I found it was just a little smaller than I wanted. I suggest a circle with a 15 inch diameter.

As you can see I chose 2 coordinating fabrics
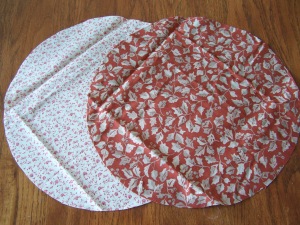
2.) I find it easier to work with if I sew the trim to the right side of one circle...

3.) ...then sew the second circle to the first one (right-sides together), sandwiching the trim between the two pieces. Leave a few inches unsewn and turn right-side out. (P.S. If you don't have a piping foot, a zipper foot is very helpful)

*************************************************************************************
No-Sew Instructions:
1.)Iron a quarter-inch fold, towards the back, around the edges of both circles.
2.) Hot glue the trim to the back (wrong side) of one circle
3.) Then glue the second circle wrong-sides together to the trim, leaving a portion of the edge open to stuff.
************************************************************************************
4.) Stuff lightly.
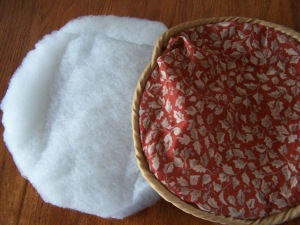
5.) Cut the bottom off of the soda bottle about 4 or 5 inches up. The bottom will be your basket.
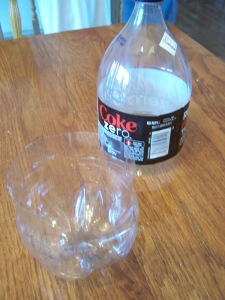
6.) Cut a strip of fabric long enough to cover the circumference of the bottle, and 8 inches wide. Hot glue this piece to the outside of the bottle, then fold to the inside of the bottle and glue down.
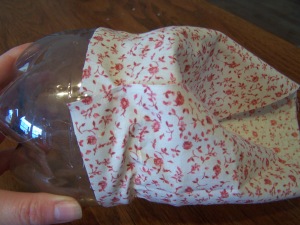
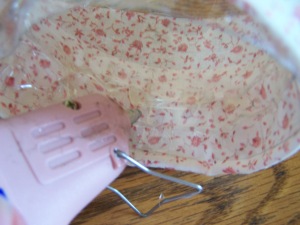

7.) Place the bottle on the center of the stuffed circle. Gather the circle upward and secure with the rubber band.
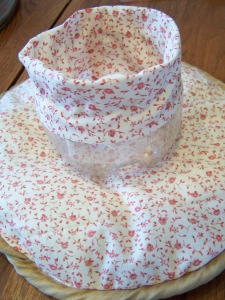
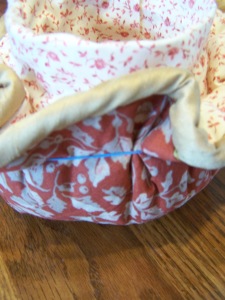
8.) Cover the rubber band with a ribbon.

9.) Fill with whatever goodies you like: flowers; candy; potpourri; tea and crackers; soup mix; etc. Wouldn't this be a great gift basket or craft/party favor?

I filled mine with the lovely Coffee Filter Flowers I made (yes, I said those flowers were MADE) from Aunt Peaches' Blog.

You Will Need:
- A Plastic Bottle (2-Liter soda bottles work well)
- Fabric
- Trim
- Glue Gun
- Rubber band
- Ribbon
- Stuffing

1.) Cut 2 circles from your fabric. I used a 13 inch pot-lid to trace them out, but I found it was just a little smaller than I wanted. I suggest a circle with a 15 inch diameter.

As you can see I chose 2 coordinating fabrics

2.) I find it easier to work with if I sew the trim to the right side of one circle...

3.) ...then sew the second circle to the first one (right-sides together), sandwiching the trim between the two pieces. Leave a few inches unsewn and turn right-side out. (P.S. If you don't have a piping foot, a zipper foot is very helpful)

*************************************************************************************
No-Sew Instructions:
1.)Iron a quarter-inch fold, towards the back, around the edges of both circles.
2.) Hot glue the trim to the back (wrong side) of one circle
3.) Then glue the second circle wrong-sides together to the trim, leaving a portion of the edge open to stuff.
************************************************************************************
4.) Stuff lightly.

5.) Cut the bottom off of the soda bottle about 4 or 5 inches up. The bottom will be your basket.

6.) Cut a strip of fabric long enough to cover the circumference of the bottle, and 8 inches wide. Hot glue this piece to the outside of the bottle, then fold to the inside of the bottle and glue down.


7.) Place the bottle on the center of the stuffed circle. Gather the circle upward and secure with the rubber band.


8.) Cover the rubber band with a ribbon.

9.) Fill with whatever goodies you like: flowers; candy; potpourri; tea and crackers; soup mix; etc. Wouldn't this be a great gift basket or craft/party favor?

I filled mine with the lovely Coffee Filter Flowers I made (yes, I said those flowers were MADE) from Aunt Peaches' Blog.

Monday, October 25, 2010
Making a Cowl Scarf-No Knitting Required
Cowl Scarves are everywhere this season. If you would like to add one (or more) to your wardrobe, inexpensively, look no further than your own closet. I will be using the leftovers from the long knit skirt in last Friday's blog. You, however, can use a sweater.
Here's the piece I had after cutting strips for the poncho

1.) I started by cutting the faux-pleat section from the waistband. If you are using a sweater, cut your strip double the width you want it to be when finished.

2.) I had to cut at one of the seams so that I had a long strip (otherwise I couldn't turn it right-side out). Then, just fold the right-sides together and sew the long edge. Turn right side out.

3.) Fold in the edge of one end, and stuff the other end inside of that. Stitch it shut.

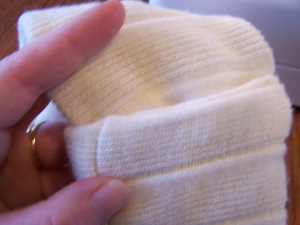
You have now a cowl scarf. Wind it around your beautiful neck and accessorize with a just as beautiful pin.


Here's the piece I had after cutting strips for the poncho

1.) I started by cutting the faux-pleat section from the waistband. If you are using a sweater, cut your strip double the width you want it to be when finished.

2.) I had to cut at one of the seams so that I had a long strip (otherwise I couldn't turn it right-side out). Then, just fold the right-sides together and sew the long edge. Turn right side out.

3.) Fold in the edge of one end, and stuff the other end inside of that. Stitch it shut.


You have now a cowl scarf. Wind it around your beautiful neck and accessorize with a just as beautiful pin.


Labels:
Accessories,
Clothing,
quick,
Re-Purposing,
repurpose,
scarf,
scrap,
sewing,
stash buster,
Tutorial,
upcycle,
Upcycling,
winter
Friday, October 22, 2010
Remake: Ruffled Poncho
It's that time of year in the North-Midwest. There's frost on the grass in the morning, Apple Cider is a grocery staple, and cozying up in your favorite blanket with a mug of coffee/cocoa/tea is a luxury we all indulge in.
Wouldn't we love it if we could stay wrapped up in our blankets all day? But that would make it a shawl or poncho... well there's an idea! And that's where my two yard sale finds com in.

A chenille yarn throw and a full length knit skirt. Fifty cents each!
As you can see, the blanket is a little worn. The tag on it says "Dry Clean Only", and the easiest way to take care of that is to cut the tag off. Really, I'm not going to dry clean it. I just pop it in the wash to get any shrinking done and over with.
**Note to self: chenille yarn doesn't shrink...it fuzzed out all over the washing machine**
1.)So with everything washed and dried, I trim off the scraggly ends.

2.) Fold the blanket into fourths, and cut a shallow neck hole. You may want to use a shirt as a guide. (Remember: Start small!)

3.) Unfold once (so it's only folded in half: short ends together at the bottom), cut down the center from neck to bottom edge.
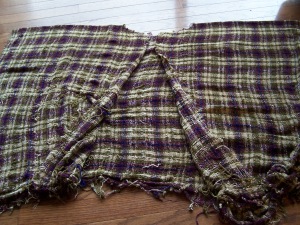
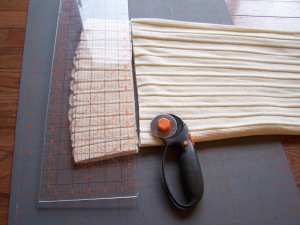
4.) Cut strips from the skirt. I cut four strips about 4 inches wide and then sewed three pieces together to make a long ruffle around the neck and down the front, with one piece to trim the bottom edges. Of course how many you need to cut etc. will all depend upon your available materials.

I just noticed the strings hanging down. LOL I missed those ones but since it's all stitched, it's easily taken care of with a quick snip.



Wouldn't we love it if we could stay wrapped up in our blankets all day? But that would make it a shawl or poncho... well there's an idea! And that's where my two yard sale finds com in.

A chenille yarn throw and a full length knit skirt. Fifty cents each!
As you can see, the blanket is a little worn. The tag on it says "Dry Clean Only", and the easiest way to take care of that is to cut the tag off. Really, I'm not going to dry clean it. I just pop it in the wash to get any shrinking done and over with.
**Note to self: chenille yarn doesn't shrink...it fuzzed out all over the washing machine**
1.)So with everything washed and dried, I trim off the scraggly ends.

2.) Fold the blanket into fourths, and cut a shallow neck hole. You may want to use a shirt as a guide. (Remember: Start small!)

3.) Unfold once (so it's only folded in half: short ends together at the bottom), cut down the center from neck to bottom edge.

4.) Cut strips from the skirt. I cut four strips about 4 inches wide and then sewed three pieces together to make a long ruffle around the neck and down the front, with one piece to trim the bottom edges. Of course how many you need to cut etc. will all depend upon your available materials.


5.) Pin and stitch the trim in place.
6.) Wear! The edges are a little rough yet, I might make my own bias tape and sew that on later.
I just noticed the strings hanging down. LOL I missed those ones but since it's all stitched, it's easily taken care of with a quick snip.


Labels:
Accessories,
cheap,
Clothing,
dress,
easy,
fall,
fashion,
inexpensive,
low cost clothing,
making over your wardrobe,
quick,
Re-Purposing,
repurpose,
top,
Tutorial,
upcycle,
Upcycling,
winter
Thursday, October 21, 2010
Shirt to Skirt Tutorial: The Fourth and Final Olympic Tee
The second off-white olympic tee is in for a completely different use... and I think it's my favorite! We're going to cut, sew, and add a little embellishment to turn a so-so top into a cute bottom (and we all want a cute bottom).
1.) Cut the Sleeves off keeping it in alignment with the sides of the shirt.
2.) Cut the shoulders to form a straight line at the top.
3.) Cut the bottom to the length you want your skirt, plus an inch (add more if you will be making a casing for your elastic).

4.) We're going to make some easy (What? Yes, I said easy!) pockets using the front half of the sleeves. Cut only the front portion of the sleeves about an inch from the curved seam, then fold inward and stitch down.


5.) On the piece you cut from the bottom, cut in half at the sides. You will use one piece to make your pockets.

I'm not entirely sure which is best... sewing the piece on now, or after you embellish. Here's what I did:
6.) Sew one piece to the pocket-front, stitching across the top/waist.

7.) Flip the piece to the inside of the skirt and stitch across the bottom edge, and then down the center. Easy pockets!
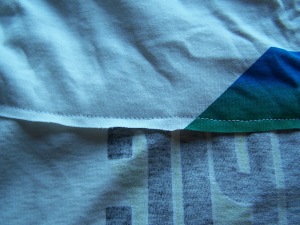
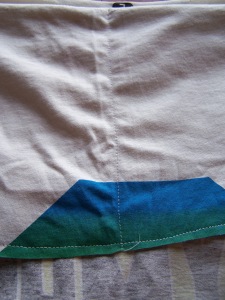
8.) Sew the open side seams together-Right-Sides together, of course.
9.) Now for the fun part... embellishing! Using some coordinating lace or trim, make patches to cover the silk-screening.
The Black Lace I was planning on using was a little too see-through. So I cut patches from leftover pieces, to go with the lace.

1.) Cut the Sleeves off keeping it in alignment with the sides of the shirt.
2.) Cut the shoulders to form a straight line at the top.
3.) Cut the bottom to the length you want your skirt, plus an inch (add more if you will be making a casing for your elastic).

4.) We're going to make some easy (What? Yes, I said easy!) pockets using the front half of the sleeves. Cut only the front portion of the sleeves about an inch from the curved seam, then fold inward and stitch down.


5.) On the piece you cut from the bottom, cut in half at the sides. You will use one piece to make your pockets.

I'm not entirely sure which is best... sewing the piece on now, or after you embellish. Here's what I did:
6.) Sew one piece to the pocket-front, stitching across the top/waist.

7.) Flip the piece to the inside of the skirt and stitch across the bottom edge, and then down the center. Easy pockets!


8.) Sew the open side seams together-Right-Sides together, of course.
9.) Now for the fun part... embellishing! Using some coordinating lace or trim, make patches to cover the silk-screening.
The Black Lace I was planning on using was a little too see-through. So I cut patches from leftover pieces, to go with the lace.

10.) When you are satisfied with your arrangement, sew your patches in place.
*** This is where I am torn about making the pockets prior to embellishing. If I waited to make the pockets I would have had the straight stitching lines running through the patches. However, since I made the pockets first, I had to arrange the patches so as not to sew the pockets shut.
If you opt to embellish first, at this point you would sew in your pocket panel using steps 6 and 7.
11.) Hem the Waist and Bottom edge of your skirt, and add your elastic. I chose to use the shirring technique as I did in the second Blue and Black Skiing shirt.
There you have it. A really simple skirt with pockets.
Labels:
Clothing,
dress,
easy,
fashion,
low cost clothing,
mak over your wardrobe,
quick,
Re-Purposing,
repurpose,
sewing,
Skirt,
stash buster,
T-shirt,
T-Shirt Makeover,
Tutorial,
upcycle,
Upcycling
Wednesday, October 20, 2010
Light and Fluffy: The Continuing Saga of the Olympic T-Shirts
Set #2: Off White with Colorful Screen Printing

These shirts had me stumped for a few days. I had the same problem as with the blue and black shirts, but I didn't want to just copy my previous makeovers. I decided to borrow an idea from Suzannah at Adventures in Dress Making, who had borrowed the idea from a J. Crew Tank Top (you can't stop the inspiration).
1.) (Using only one of the shirts) I cut the tee at my hip. This is where I will add a fitted band of ribbing.

2.) Cut the bottom piece into strips, and then cut these strips into rectangles and squares of various sizes.

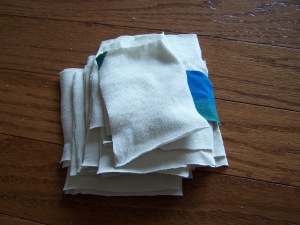
3.) On each of these squares/rectangles stretch two opposite ends, making them roll in.

4.) Here is where I altered the neckline (cut the shoulder seams a couple of inches and stitch down as I stated in yesterday's tutorial), and attached the fitted ribbing band at the bottom. I pinned it in place and stretched the band as I sewed, to fit it to the larger t-shirt edge.

5.) with the two curled edges on the sides, pleat and pin the cut pieces onto the shirt. Stitch down only at the top edge of each piece (I do this by stitching across the entire row).


After they are all stitched down you have a light and fluttery new top!
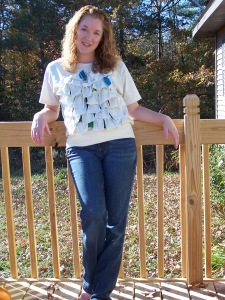 Tomorrow we tackle the evil twin!

These shirts had me stumped for a few days. I had the same problem as with the blue and black shirts, but I didn't want to just copy my previous makeovers. I decided to borrow an idea from Suzannah at Adventures in Dress Making, who had borrowed the idea from a J. Crew Tank Top (you can't stop the inspiration).
1.) (Using only one of the shirts) I cut the tee at my hip. This is where I will add a fitted band of ribbing.

2.) Cut the bottom piece into strips, and then cut these strips into rectangles and squares of various sizes.


3.) On each of these squares/rectangles stretch two opposite ends, making them roll in.

4.) Here is where I altered the neckline (cut the shoulder seams a couple of inches and stitch down as I stated in yesterday's tutorial), and attached the fitted ribbing band at the bottom. I pinned it in place and stretched the band as I sewed, to fit it to the larger t-shirt edge.

5.) with the two curled edges on the sides, pleat and pin the cut pieces onto the shirt. Stitch down only at the top edge of each piece (I do this by stitching across the entire row).


After they are all stitched down you have a light and fluttery new top!
 Tomorrow we tackle the evil twin!
Labels:
cheap,
Clothing,
easy,
fashion,
inexpensive,
low cost clothing,
making over your wardrobe,
quick,
Re-Purposing,
repurpose,
sewing,
stash buster,
T-shirt,
T-Shirt Makeover,
Tutorial,
upcycle,
Upcycling
Subscribe to:
Comments (Atom)


